I have learnt that the key rule of continuity editing are to make the edits look as invisible as possible.
Using a digital SLR camera was surprisingly easy, they are very simple and just like any other camera really, just a little bit bigger. Also uploading the pictures onto the computer was easy too, we put the tape into the actual computer device and they upload.
I have also learnt that i am not as well organised than i sometimes think i am. i believed that we was organised and ahead of time however, when it came down to filming we had no real structure as to how we was going to shoot our video, we hadn't thought out each shot properly so at the time just improvised, hence it all going wrong and having to re shoot it. i think that we should have took more time to organise how me were going to operate and think up a proper story board so that we knew what we were doing whilst filming. also we didn't organise the actors very well. at the time we just found some random people who ere free at that time, which made it awkward whilst filming and t felt like w were wasting there time so we were quite rushed. We needed to organise set actors and run through the script and actions before hand with the actors so that we were not wasting any valuable time when it came to filming.
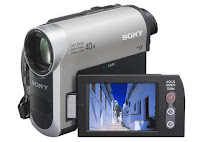
 However, i think using the video camera went pretty well, it was very simple and easy, just press record and film however we did not use a tripod because at the time we felt i was unnecessary, however later on whilst watching the video back, we realised that it was need in some parts just to make the filming look more professional.
 We managed to get our video onto a computer programme called Adobe On location CS5 where we were able to upload and save our different shots of the video to make editing easier and more sophisticated.
After this, we were able to edit our video on another computer programme called Adobe Premier Pro CS5 where we were able to put our video together, this certain programme allowed us to put each shot together and it makes it look continuous and as if they are all out together. this was very hard though as you have to make sure you've moved more than 30 degrees on the same shot so that it looks natural and realistic, which is what we didn't do so our video is very jumpy and does not look continuous.
However, i have learnt allot from this process and one of that main things i have learnt is that technology isn't very reliable. The system broke down a couple of times and sometimes did not do as was expected which was very annoying and wasted our time, time which we didn't have to loose. also we found that it was very difficult to edit as it took a very long time and was very aggravating as the programme is very complicated and you need to understand how to operate on it.
In the end our video was not good at all. it is very jumpy and hard to watch as it is not continuous and doesn't flow much but we have learnt allot and would now be ale to do it again confidently but with a bit more organisation and time spent on the idea.
Our video was then uploaded onto YouTube for the whole world to see, this is a quick and easy way to access our video from school or home or any computer.
Getting our video onto my blog was very simple, I just copied the embed code from our video on YouTube and then pasted this code into my post-production.
I have found that using blogger.com is a very helpful way to keep organised and on track, it lets us see what e have done and what needs to be done in order to complete this module.
However updating my blog has been quite difficult as there is a lot of work to do and we wasn't given a great deal of time, never the less it has been a great experience and a huge learning curve for me, and i now know that it is essential to update my blog regularly otherwise i will fall behind.
To conclude, i found this Continuity task very interesting and i have learnt allot about filming and editing and also organisation. it has been a great way to start off this course and i know understand the means and ways in which continuity editing works.


.jpg)
